LEMP stack is a group of software that is the most essential when you host a website. In this tutorial we will Install and Configure Nginx, MariaDB, PHP 8.1 (LEMP Stack) in Ubuntu which you can further use to deploy your web application.

Here in this tutorial, we will learn to install and configure the LEMP stack for website hosting on Ubuntu and if you want to boost your website’s performance then you can configure FastCGI cache using this guide.
In this Tutorial
Install and Configure Nginx, MariaDB, PHP8.1 (LEMP Stack) in Ubuntu
Prerequisites
Before going through, we need to have a user with “sudo” privileges and a configured firewall. You can follow our initial Server setup guide to do the same.
Step 1 – Installing Nginx
Every website needs a web server to server the web pages to the client. Here we are using Nginx which is a high-performance web server.
$ sudo apt update
$ sudo apt install nginx -y
If you have configured the UFW firewall, you must allow Nginx in UFW to receive and send requests.
$ sudo ufw app list

Output
Available applications:
Nginx Full
Nginx HTTP
Nginx HTTPS
OpenSSH
Since we haven’t configured SSL yet, we will only allow Nginx HTTP which is running on port 80
$ sudo ufw allow 'Nginx HTTP'Verify the rule using
$ sudo ufw statusThe output should look like this
Output
Status: active

To                         Action      From
--                         ------      ----
OpenSSH                    ALLOW       Anywhere
Nginx HTTP                 ALLOW       Anywhere
OpenSSH (v6)               ALLOW       Anywhere (v6)
Nginx HTTP (v6)            ALLOW       Anywhere (v6)
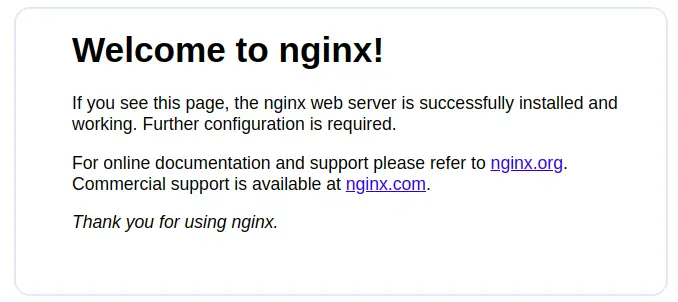
Now, just open any browser and enter your server IP or domain to check Nginx is working or not.
http://server_domain_or_IP
Step 2 – Installing MariaDB
Now that our web server is up and running, we need a database system that will store and manage all the data of the website. Here we are using the Mariadb server which is fast in terms of performance and delivers consistent speed.
$ sudo apt install mariadb-server -yAs the installation finishes, you must make sure to secure your database. Run the given below script that comes pre-installed with Mariadb
$ sudo mysql_secure_installationRight after running the above script, you will be prompted with some questions.
Make sure to set a strong password for “root”, then press “n” to deny the socket security. For the rest, press “y” and continue.
Now, let’s open MariaDB just to test whether the configuration is correct.
$ sudo mysql -u root -pEnter your root’s password and you should see
Output
Welcome to the MySQL monitor.  Commands end with ; or \g.
Your MySQL connection id is 10
Server version: 8.0.28-0ubuntu4 (Ubuntu)

Copyright (c) 2000, 2022, Oracle and/or its affiliates.

Oracle is a registered trademark of Oracle Corporation and/or its
affiliates. Other names may be trademarks of their respective
owners.

Type 'help;' or '\h' for help. Type '\c' to clear the current input statement.

mysql>
To exit, type “exit;” and hit enter.
mysql>exit;Step 3 – Installing PHP 8.1
Now we have our Nginx and Mariadb configured. Nginx will be the webserver to show web pages and MariaDB will be the database to store the data.
PHP on the other hand will serve the content. To serve content from PHP, Nginx needs a program that works like a bridge between PHP and Nginx which is PHP-FPM.
To install PHP 8.1, run the below command
$ sudo apt install php8.1 php8.1-fpm php-mysql -yAs the installation is completed. We will have to create a folder where we will store our web pages and other website content and assign permission to the Nginx user ($USER) to access that folder
$ sudo mkdir /var/www/your_domain

$ sudo chown -R $USER:$USER /var/www/your_domain
Note- Make sure to update “your_domain” with the domain name you are using for this website.
Now, let’s configure the Nginx server block. For that create a new file and paste the content given below
server {
listen 80;
server_name your_domain www.your_domain;
root /var/www/your_domain;

index index.html index.htm index.php;

location / {
    try_files $uri $uri/ =404;
}

location ~ \.php$ {
    include snippets/fastcgi-php.conf;
    fastcgi_pass unix:/var/run/php/php8.1-fpm.sock;
 }

location ~ /\.ht {
    deny all;
}
}
Note- Make sure to update “your_domain” with the domain name you are using for this website.
Save by pressing “CTRL+X” and “y” hit enter.
Now we will have to activate our Nginx configuration by linking it under the “sites-enabled” folder which is the default folder for Nginx to read.
$ sudo ln -s /etc/nginx/sites-available/your_domain /etc/nginx/sites-enabled/Note- Make sure to update “your_domain” with the domain name you are using for this website.
Now, unlink the default Nginx file by
$ sudo unlink /etc/nginx/sites-enabled/defaultNow let’s test the Nginx syntax by
$ sudo nginx -tIf everything is correct, you will get a message as
"nginx: the configuration file /etc/nginx/nginx.conf syntax is ok"
"nginx: configuration file /etc/nginx/nginx.conf test is successful"
Now reload nginx
$ sudo systemctl reload nginxStep 4 – Testing the Configuration
Now, let’s create an HTML test page and check our configuration
$ sudo nano /var/www/your_domain/index.htmlCopy and paste the given code
<html>
  <head>
    <title>your_domain website</title>
  </head>
  <body>
    <h1>Hello World!</h1>

    <p>This is the landing page of <strong>your_domain</strong>.</p>
  </body>
</html>
Save by pressing “CTRL+X” and “y” hit enter.
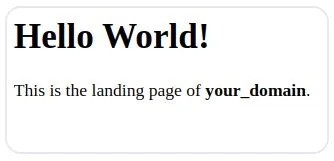
Now on a browser, enter your server IP or domain name to test

If everything is correct, you should see the page as given above.
Conclusion
With the above guide, you have learned how you can install and configure LEMP on your server. Just make sure you have followed the steps properly.
Leave a Reply