A fast-loading website is crucial when it comes to ranking and SEO improvement. We do a lot to optimize our website or blog for performance. We spend a lot of money on hosting, performance tools, and themes.

The javascript kills the Pagespeed score and most of the javascript comes from the Google Analytics code that is added to our website or blog. If you research a bit, you will find that nearly 45% of the total script is javascript. Today in this guide we will learn how to host Google Analytics locally in WordPress.
Why host Google Analytics Locally?
The benefit of hosting Google Analytics locally is it doesn’t ping Google servers to share data every time a user visits your website. It captures all the data on its own and forwards it to Google once in a while.
Advantages of hosting Google Analytics locally
- It fixes leverage browser caching errors
- Reduce the number of requests
- Improve GTmetrix, Pingdom, and PageSpeed insights score
- Reduce DNS lookup
Disadvantages of hosting Google Analytics locally
- Minimal Analytics version (GA4) collects info only about the visits and demographics
- If you have a Woo commerce website, it might create issues
How to Locally host google analytics in WordPress?
To host Google Analytics locally, we will use CAOS WordPress plugin that Daan has developed, the same developer who developed the OMGF plugin that hosts Google Fonts locally.
Step 1 – Install CAOS WordPress plugin
CAOS is my favorite plugin. I am using it on most of the websites. It offers a complete optimization solution for analytics for WordPress
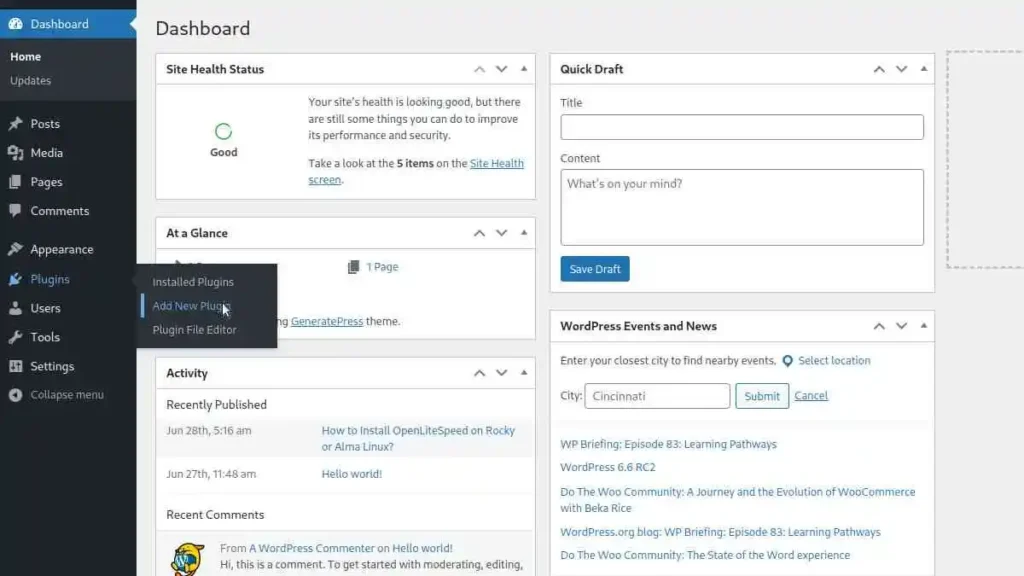
Go to “Plugins“, then click on “Add New Plugin“
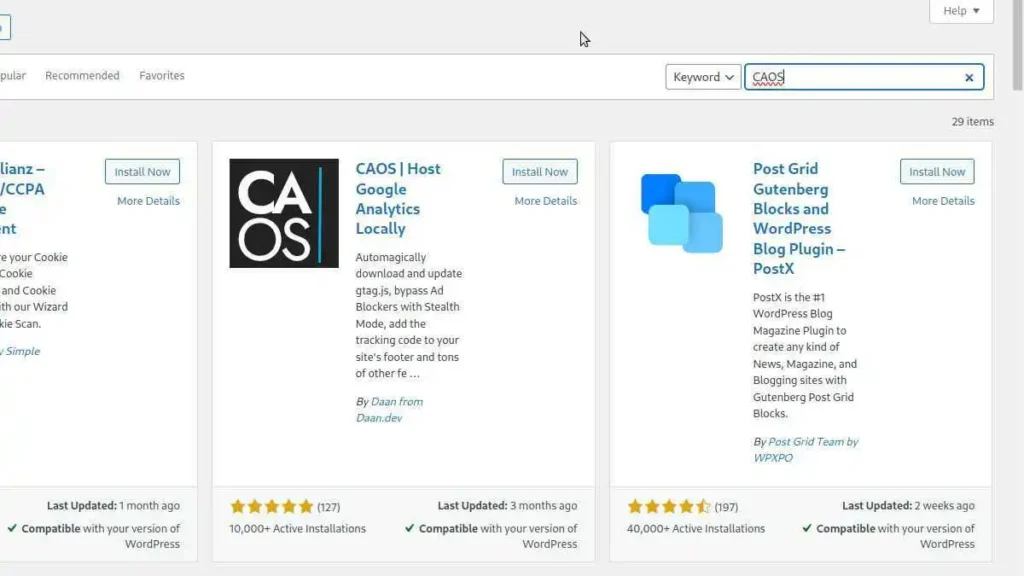
Type “CAOS” in search and you will find the CAOS plugin
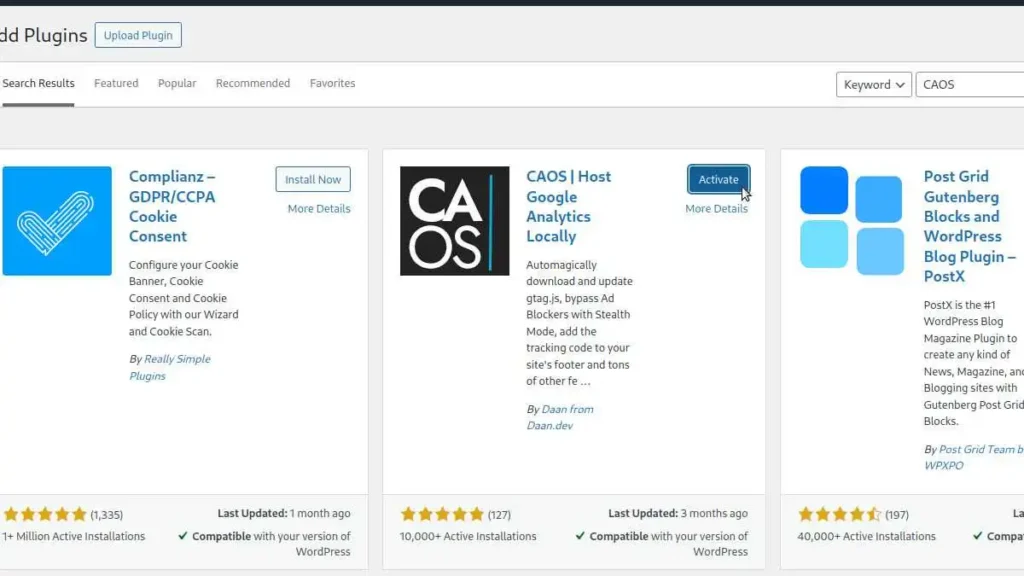
Click on “Install“, then click on “Activate“
Step 2 – Configure CAOS WordPress plugin
If you are using Google Analytics code already then, you might be aware of the Google Analytics tracking ID. It will look something like “GA-*********”. So, we won’t go into finding Google Analytics tracking ID.
Go to “Settings“, then click on “Optimize Google Analytics“
Paste your Google Analytics tracking ID in “Data Stream Measurement ID“
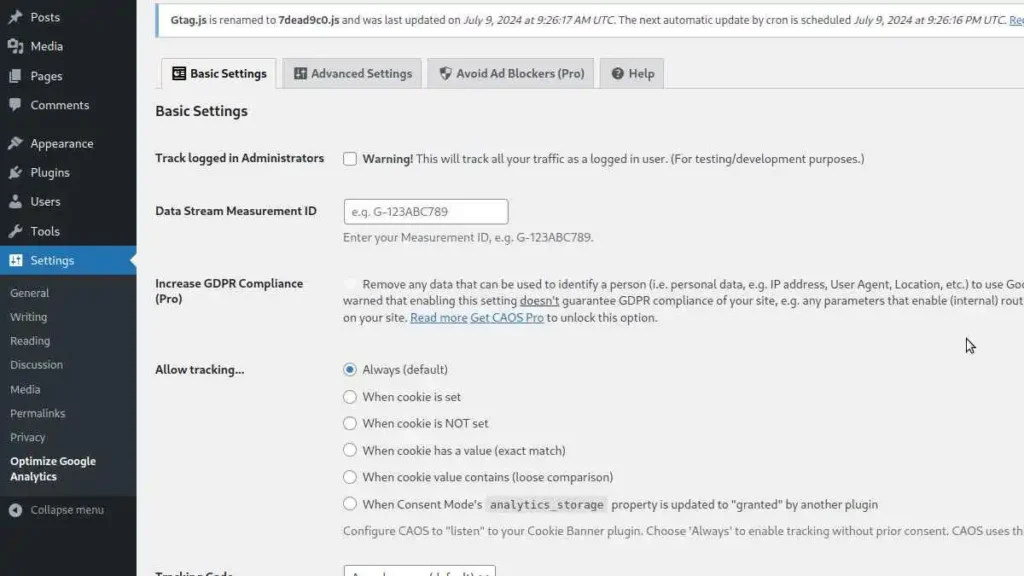
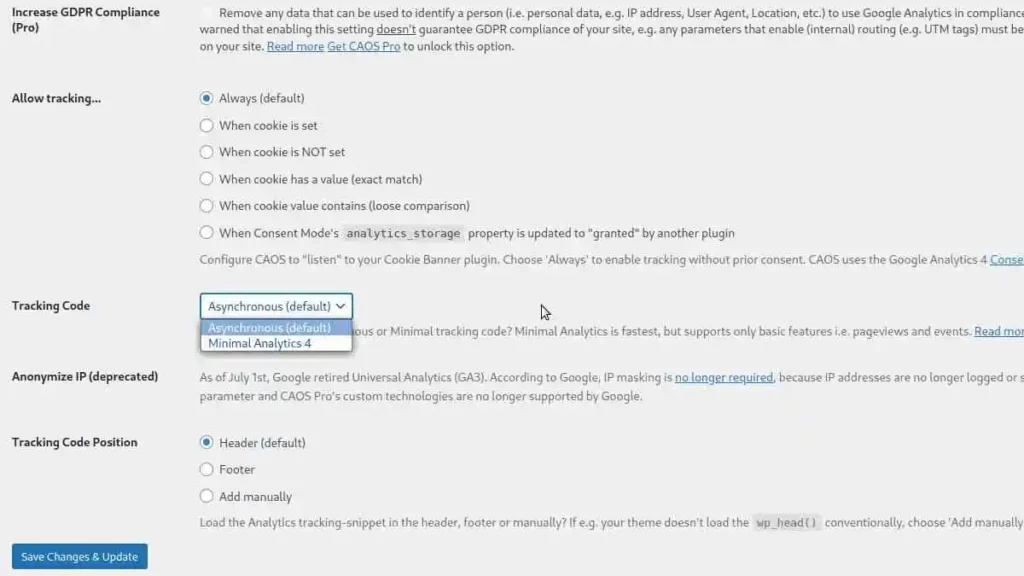
Now scroll down to “Tracking Code” and choose as per your requirement
Note* - If you have a blog, then choose "Minimal Analytics 4" as it gives analytics about pageviews and events. But if you have a woocommerce website, then you must choose "Asynchronous (default)" dropdown.
Click “Save Changes & Update“
That’s it, you have successfully hosted Google Analytics locally on WordPress.
Leave a Reply